Free USA Shipping on Orders over $35!
Love at First Write
Shopping Cart Black Bar
x

Calligraphy Tips: Solving Common Problems

Calligraphy Tips: Solving Common Problems


Calligraphy Tips: Solving Common Problems

The flowing lines and swooping curves of calligraphy inspire feelings of peace, creativity, and joy - until you see your carefully formed letters feather uncontrollably or your favorite nib splatter ink all over your paper. In this guide, we’ll show you how to solve several common dip pen calligraphy problems so that your work always turns out how you want it to.

Practice and the right equipment can do a lot to improve your results. If you’re new to calligraphy, read Calligraphy for Beginners. You’ll learn what materials you need, how to put a nib into a nib holder, and how to practice. You can also read our Brush Lettering for Beginners and Watercolor Calligraphy for Beginners guides if you’re more interested in those styles. Otherwise, let’s get started!

BAD INK FLOW

Whether your ink rushes onto the paper or just sticks to the nib, bad ink flow can ruin a project. It can happen for a variety of reasons, but it always has to do with either your nib or your ink.

Bear in mind that you’ll need to re-dip your pen often. Dip pens don’t have a large reservoir like fountain pens, so you’re working with only the ink on the nib. Expect to dip your pen in ink every few letters or words. It also helps to touch your nib against the ink bottle to remove excess ink so that it doesn’t leave blobs on the paper.

Prepare New Nibs
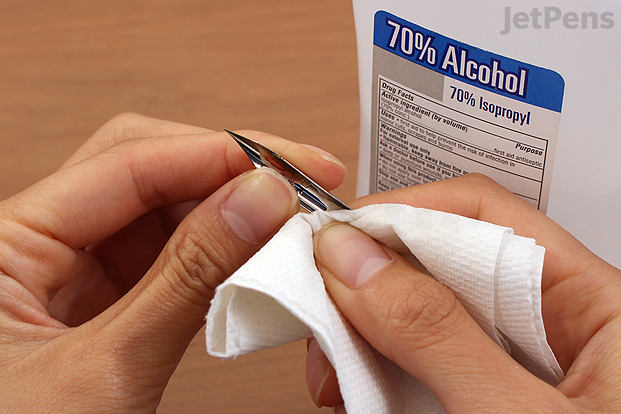
Remove the coating on new nibs for improved ink flow.
Remove the coating on new nibs before you use them.
New nibs come with a protective coating that helps keep them looking pristine. If you use the nib with that coating still in place, ink will run off the nib too quickly. You can remove the coating by wiping nibs with rubbing alcohol, scrubbing them with non-abrasive toothpaste and a soft toothbrush, passing them through a flame, or immersing them in boiling water. It doesn’t matter what method you use, but you should always clean the coating off new nibs before you use them.
Clean the Nib
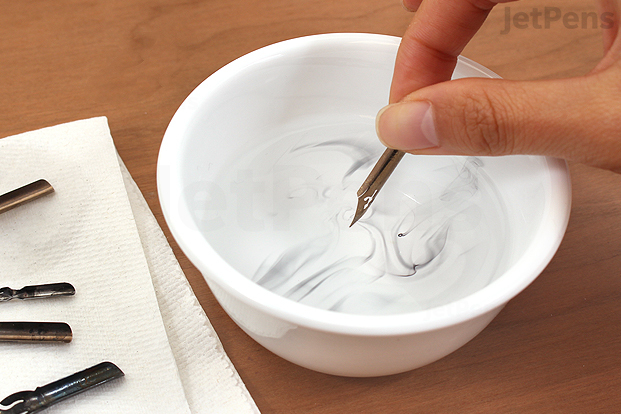
Clean nibs often to keep ink from drying on them.
Traces of ink on your nib can interfere with ink flow. Clean your nibs whenever you change inks, take a break, or start to experience flow problems. You should also remove nibs from their holders and clean hard-to-reach areas when you stop writing for the day. In most cases, you can simply rinse nibs with water. If your nib needs a more thorough cleaning because ink has dried on it, scrub it gently with a soft toothbrush and pen cleaner. Always allow nibs to dry completely before you put them away or they may rust.
Thin or Thicken the Ink
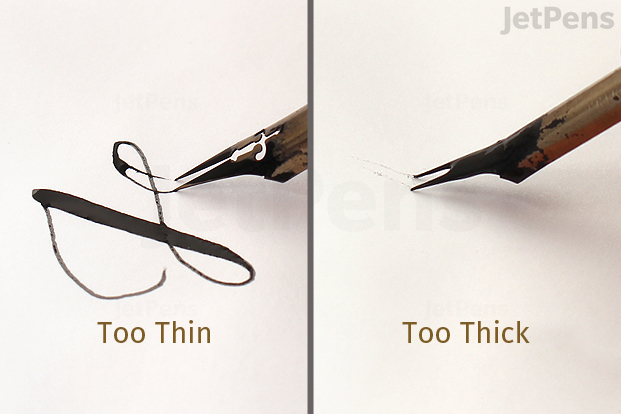
Thin ink may run off the nib too quickly, while thick ink may not flow at all.
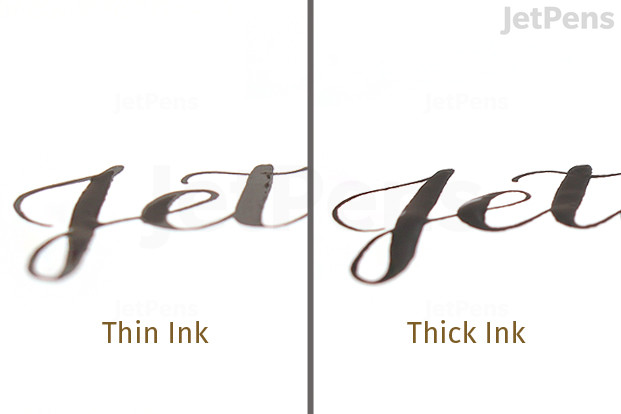
Ink that is too thin runs out after every letter, while ink that is too thick may not flow at all.
If your ink is too thin, it may rush off the nib. This extra ink flow forces you to re-dip after every letter and makes it very difficult to write. Try a more viscous option or thicken the ink by mixing in a small quantity of gum arabic. If your ink is too thick, it may stick to the nib rather than flowing onto the paper. It’s easy to thin inks like this with distilled water. In both cases, start with very small amounts of gum arabic or water and mix the ink in a separate container to avoid contaminating a whole bottle. Check out our Guide to Mixing Calligraphy Inks for detailed instructions. You can also switch to a different ink that has the characteristics you need.
Use a Different Nib
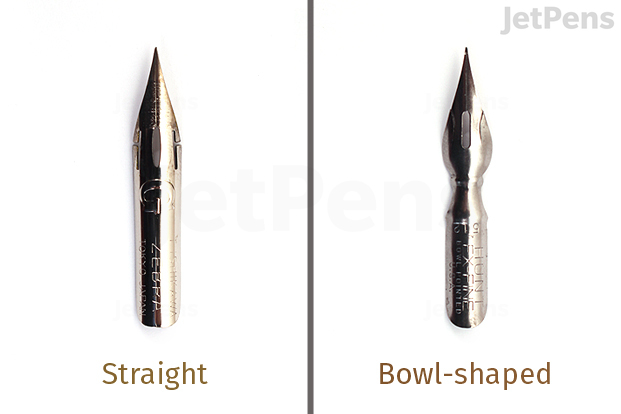
Use bowl-shaped nibs instead of straight models to regulate ink flow.
Bowl-shaped nibs like the Speedball No. 512 regulate ink flow more than straight models.
Another way to prevent thin ink from rushing off your nib is to use one with a shape that helps regulate ink flow. Straight models like the popular G-nib or Speedball 101 allow ink to quickly run down the nib. Bowl-shaped nibs delay the stream of excess ink and allow it to flow more consistently. They also help the nib hold more ink so that you don’t have to re-dip as often. These nibs are all good options:
FEATHERING OR BLEEDING

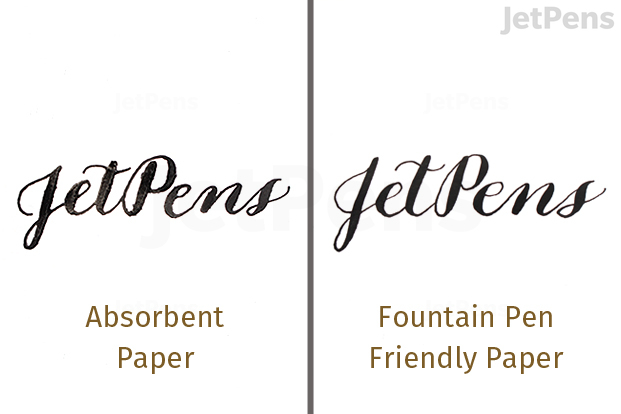
Calligraphy inks are generally quite wet and can bleed through or feather on many kinds of paper. Bleeding occurs when ink soaks through paper, while feathering happens when ink spreads out along the paper fibers. Both are more likely when you pair wet inks with absorbent paper.

Smooth paper like Rhodia helps prevent feathering.
Smooth, high quality paper is best for dip pens. It absorbs ink more slowly and is also less likely to snag your nibs. Generally speaking, if a paper is good for fountain pens, it will also work for dip pens. Rhodia is excellent. In addition to its silky surface, it comes in blank, dot grid, lined, and graph paper styles that provide as much or little guidance as you like. Marker paper is another good choice. It is smooth and can stand up to very wet tools. It’s also semi-transparent, which makes it easy to use with guide sheets.
Use a Thicker Ink
Thin inks sink into paper quickly, while thick inks sit on top of the surface.
If you need to use absorbent paper for a project, don’t panic. Thicker inks don’t sink into paper as quickly as thin inks, so they’re less likely to feather or bleed. Try switching to an ink that comes in a thicker form, like Speedball Calligraphy Ink, or thicken the ink you already have with gum arabic.
NOT ENOUGH STROKE VARIATION

Modern calligraphy and traditional styles alike are built on line variation. It’s tricky to master, so consistent practice is key to help you build and control your line widths. Try the drills in our Calligraphy for Beginners article if you’ve only been doing calligraphy for a short while.

Use a More Flexible Nib
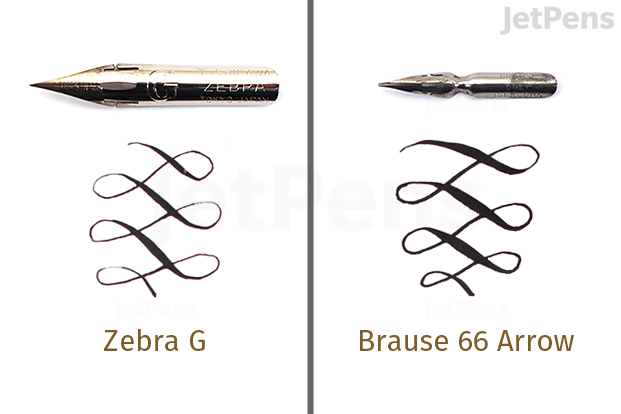
Flexible nibs like the Brause 66 Arrow can achieve more line variation than stiffer nibs.
Different nibs have different amounts of flex. If you’re using a harder nib, the contrast between your upstrokes and downstrokes may not be as dramatic as you want. We recommend G nibs for beginners because their relative stiffness makes them easy to handle. If you’ve been practicing for a few months and aren’t getting the results you want, try the nibs below. You can also check out our Calligraphy Pen Basics Guide and Guide to Nibs and Nib Holders for more options.
Rotate Your Arm
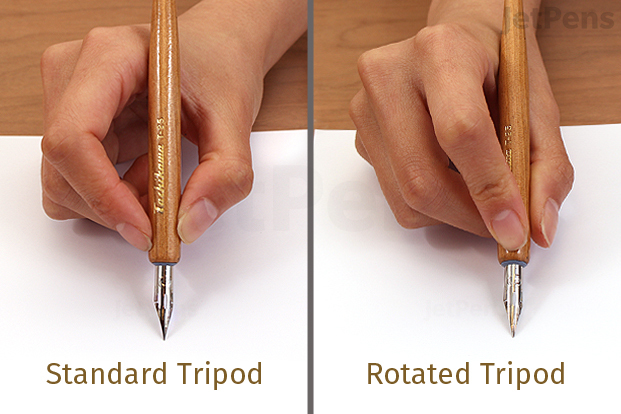
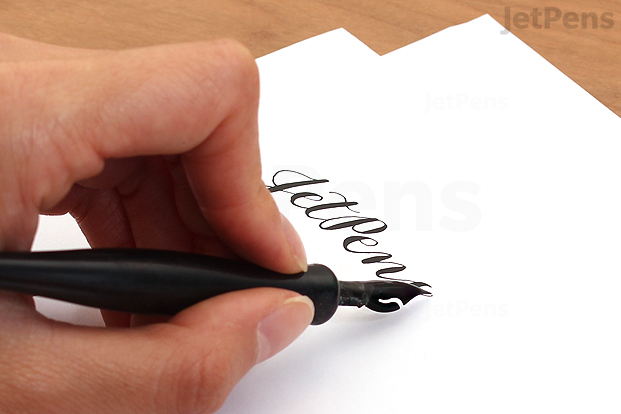
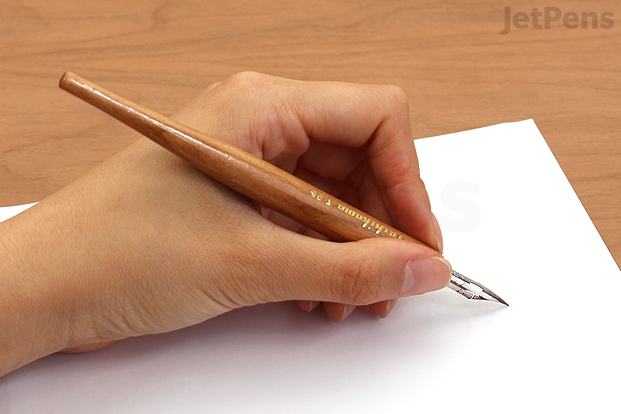
Rotate your grip to exert more pressure with your index finger.
The standard tripod grip is often the most comfortable and effective for calligraphy. It places your index finger on the side of the pen where it can guide and support your pen’s movement without a lot of effort. A simple modification can help you exert more pressure and control it more easily by pressing with your index finger. Rotate your arm so that your wrist points down toward the table and your index finger rests on top of the nib holder. This may be less comfortable than the standard grip and not all styles require the extra force, so don’t feel the need to change your grip if practice and nib changes yield the line variation you want.
NIBS CATCHING OR SCRATCHING ON PAPER

It’s common for nibs to feel scratchy or catch on paper. This can be unpleasant and even cause ink splatters. Nibs are more likely to scratch and catch on rough paper, so you should first check that you’re using smooth, fountain pen friendly paper. If you are, changing your writing style or nib may do the trick.

Use a Light Touch
Allow the nib to just barely touch the paper when making upstrokes.
Just barely touch the paper with the nib when making upstrokes.
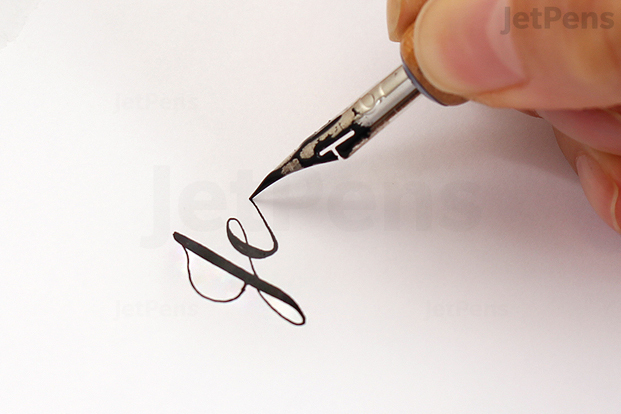
As suggested by the name, nibs used for pointed pen calligraphy are quite sharp. It’s easy for them to dig into even the best paper if you press down too hard. They work best if you use a light touch, especially on upstrokes when the tip of the nib pushes toward the paper. Imagine the nib as a water strider, which is so light that it can skate freely on the surface of the water. Don’t add any pressure to the nib as it touches the paper - its weight will be just enough for it to leave a trail of ink. This takes a lot of practice, so stick with it!
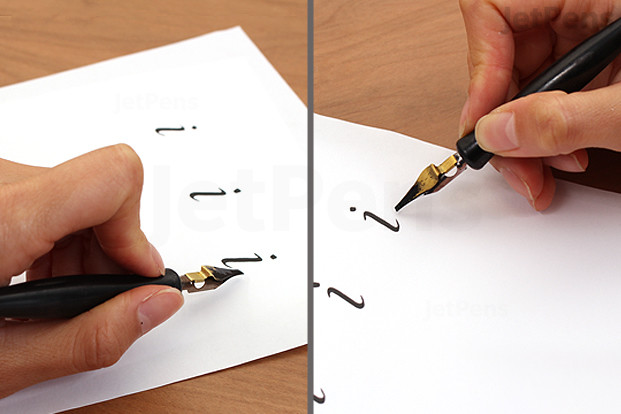
Hold Your Pen at a Shallow Angle
Prevent nibs from stabbing the paper by holding them at a low angle.
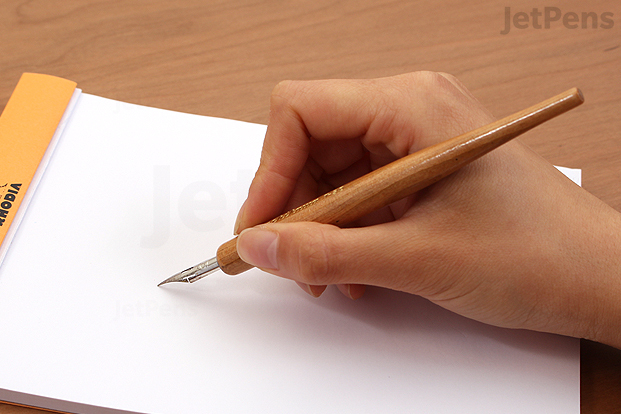
Hold nibs at a low angle to prevent them from stabbing the paper.
Many people write with their pen or pencil held at a steep angle to the paper. This works well for forgiving writing instruments like ballpoint and gel pens, but it encourages fountain and dip pen nibs to “stab” the paper. It can also interfere with ink flow. If you hold your pen this way, modify your grip so that the nib holder rests on the web of your thumb. This will allow the nib to form a shallower angle with the paper and move more smoothly.
Use a Less Flexible or Duller Nib
The rounded tip of the Speedball No. 512 is less likely to catch on textured Global Art Kona Drawing Pad paper.
Although all pointed nibs are sharp, some are not as sharp or delicate as others. They can handle rougher paper and are less likely to catch. These nibs are a good choice if you plan to use difficult paper:
FIBERS OR THREADS IN NIB

Fibers can easily catch in the tines of your nib. They also get coated in ink and can cause unsightly lines and blotches around your otherwise gorgeous writing. Fibers often come from the paper you write on, so choose smooth paper and try the suggestions above to keep your nib from catching.

Use a Lint-free Towel
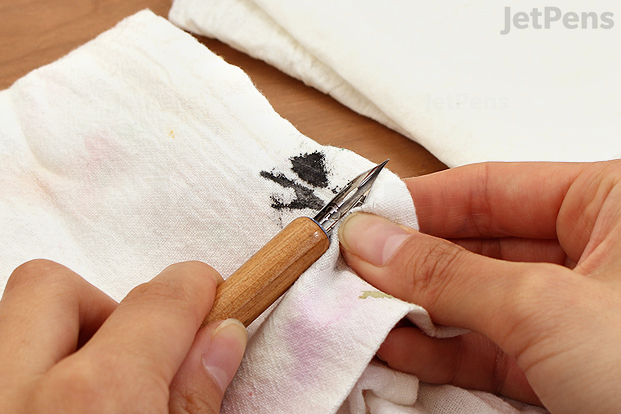
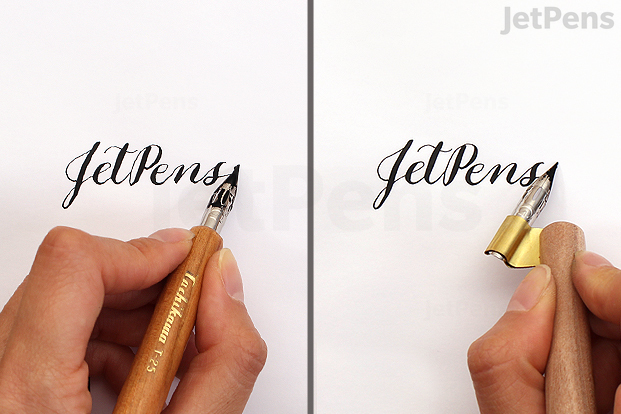
Linen cloths and cloth-like paper towels are less likely to deposit lint on your nib.
You’ll be drying your nib frequently as you work, so it’s important to use a cloth that won’t deposit lint on your nib or snag on its tip. Linen napkins work well, as do some paper towels. If you choose to use paper towels, look for high-quality ones that resemble cloth.
TIPS FOR LEFTIES

Anyone can do calligraphy. However, most instructions and calligraphy equipment are designed with right-handers in mind and don’t work as well for left-handers. All of the tips we’ve covered also apply to left-handed calligraphers. Firmer or duller nibs like those we mentioned earlier are especially good for lefties, as they are more forgiving of unusual strokes. Read our Guide to Left-Handed Pens & Writing Supplies for general writing suggestions, try the tips below, and experiment to discover what works for you.

Left-handed Italic nibs help lefties use edged calligraphy styles.
Most of the tips in this guide are for pointed pen calligraphy, but some styles require the use of edged, or Italic, nibs. These nibs have tips that are cut flat across or at an angle. When held by a right-handed person, the angle of a typical edged nib forms letters with a standard pattern of thin and thick lines. When held with the same grip by a left-handed person, the angle and pattern of line variation are reversed. You can use this difference to experiment with new letterforms, but lefties often have a hard time reproducing existing styles.

Fortunately, Italic nibs also come in left-handed versions. These nibs have angled tips that help lefties achieve standard line variation. You will still need to angle your paper to the right and crook your wrist, but left-handed nibs usually do make edged calligraphy easier.

Avoid smudging your work by writing under the line.
Many left-handed people struggle with ink smudging. This is because as they write from left to right, their hands pass over the ink before it dries. The easiest way to avoid this is to write with your hand under the line. This also makes it easier to produce most calligraphy styles. If underwriting doesn’t work for you, try other grips that keep your hand out of fresh ink. Some lefties do calligraphy with a hooked grip. We have even heard of left-handed calligraphers who write from right to left and upside down. We do think that underwriting is best for most people who use pointed pens, so we encourage you to give it a try.
Lefties can achieve steep slants with straight nib holders.
Left-handed calligraphers have at least one advantage over righties. Many calligraphy styles require a strong rightward slant. Right-handers often need special oblique nib holders to help them achieve these slants. Because left-handers approach their writing from the left, they naturally hold pens at a good angle for slanted styles. Try using a straight nib holder for your calligraphy before investing in an oblique holder - there’s a good chance you won’t need one.
Slant Your Paper to the Right
Angle your paper to the right for more comfortable writing.
Many instructions written with right-handers in mind suggest slanting your paper to the left. Try angling your paper to the right instead. This paper position helps left-handers write comfortably while keeping a straight line and controlling the slant of their letters. Some people like their paper to be angled up to 90 degrees, so don’t be afraid to experiment.
HOW WE APPROACH RESEARCH & TESTING

Our writers draw on their personal expertise, consult our in-house subject matter experts, and do extensive research to make our guides as accurate and comprehensive as possible. We then test every finding that makes it through the research stage. Only the techniques and tools whose performance we personally confirm make it into our guides as recommendations.

FINAL THOUGHTS

These are our calligraphy tips - do you have any for us? Let us know in the comments below!

Shop This Post
Do you want to try calligraphy but aren't sure what supplies to get? Check out our Modern Calligraphy Starter Kit. It includes all of the tools you need to create the flowing scripts of pointed pen calligraphy today.